When the KB web archive was launched in 2007, many sites from the “early” Dutch web had already gone offline. As a result, the time period between (roughly) 1992 and 2000 is seriously under-represented in our web archive. To improve the coverage of web sites from this historically important era, we are now looking into Web Archaeology tools and methods. Over the last year our web archiving team has reached out to creators of “early” Dutch web sites that are no longer online. It’s not uncommon to find that these creators still have boxes of offline carriers with the original source data of those sites. Using these data, we would (in many cases) be able to reconstruct the sites, similarly to how we reconstructed the first Dutch web index last year. Once reconstructed, they could then be ingested into our web archive.
Physical carrier formats
At this early stage of the web archaeology project, a few site creators have already lended us sample sets of offline carriers. Even though these sets are limited in size, they already contain quite a wide range of physical formats: CD-ROMs, floppy disks, ZIP disks, USB thumb drives, (internal) hard disks, and a variety of tape formats. For reading the data on these carriers, we’ve set up a desktop workstation running the BitCurator environment.
Tapes
One of the first sample sets we received contains a collection of over 30 data tapes from the mid to late ’90s. Roughly half of these are DDS-1 tapes, a format based on Digital Audio Tape. The other half are DLT-IV tapes, a type of Digital Linear Tape. The remainder of this blog post explains how we set up a workflow for reading these tapes. It also highlights some of the particular challenges we encountered along the way, and gives some (hopefully useful) hints and suggestions for others who are interested in setting up a similar workflow.
Tape drives
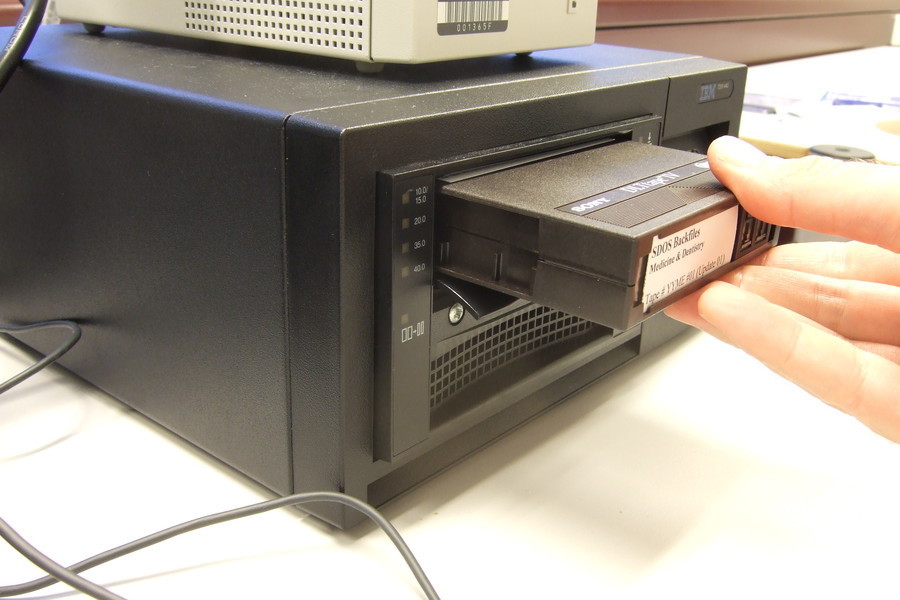
Obviously, to read these vintage tape formats you first need tape drives that support them. Luckily, our IT department turned out to have a working DDS-2 drive (which also reads DDS-1 tapes), as well as a DLT-IV drive tucked away on a shelf.
 DLT-IV drive with tape
SCSI madness
Since tape drives typically use parallel SCSI connectors, hooking them up to a modern PC is not straightforward, and requires the installation of a SCSI host adapter (AKA SCSI controller). Although used ones are available cheap online, choosing the right one can be tricky. Many older models are conventional PCI cards, which are not compatible with most modern motherboards (which these days are more likely to have PCI Express slots). Also, beware that many SCSI adapters have a 64-bit PCI interface, which is only compatible with enterprise servers1. Since online sellers often don’t mention the interface type, this website with Adaptec SCSI Card Specifications is a useful resource for checking potential compatibility issues.
In addition, rather than being one well-defined standard, parallel SCSI is really a hot mess of different standards that use different interfaces and connector types. Not all of these interfaces and connectors are mutually compatible, and interface mismatches can result in actual hardware damage. The Wikipedia entry on parallel SCSI contains some useful information on compatibility issues; a more in-depth discussion can be found here. The same web site (a treasure trove of all things SCSI) also has this illustrated overview of the most common connector types, which I found immensely helpful for identifying the connector types of our tape drives. Because of the myriad SCSI connector types, you may also need adapter plugs or cables to connect the tape drive to the SCSI controller (in our case we used this adapter plug to connect the 68-pin high-density cable of our DDS drive to SCSI controller’s VHCDI connector). Finding matching cables and adapters can be quite a challenge, not least because multiple names are used for most SCSI connector types. For instance, the commonly used 68-pin “DB68” connector is also known as “MD68”, “High-Density”, “HD 68”, “Half-Pitch” and “HP68”. Aaargh!
Another thing to keep in mind is that any unused SCSI buses on the tape drive must be fitted with a terminator, so if your drive doesn’t have one already you’ll have to track down a matching type.
Tapeimgr software
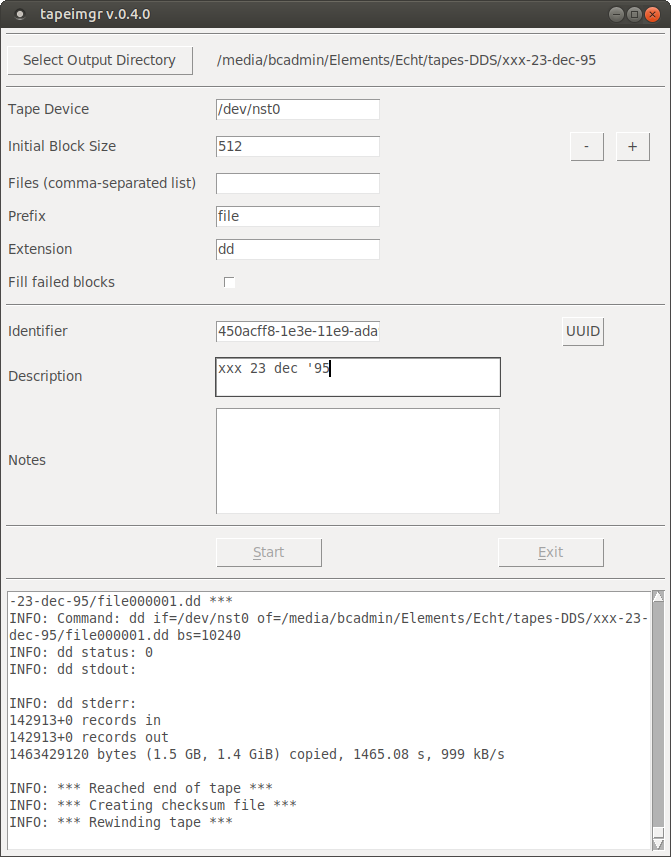
With the SCSI controller inserted into our BitCurator workstation, I hooked up one of the tape drives, and tried to read some test tapes2. Since we want to read the tape data in a format-agnostic way that is independent of the software that was originally used to write the tapes, I used Unix dd (and the mt tool to issue tape transport commands). After some experimentation, I was able to write a simple Bash script that sequentially reads all files on the tape. I then rewrote the script into what was to become the tapeimgr software. Tapeimgr (which was loosely inspired by the Guymager software) allows one to read data from a tape using a simple and user-friendly graphical interface. Internally, tapeimgr just wraps around dd and mt, but the complexities of these tools are hidden from the user. For a given tape, the software reads all files; before reading a file, it first runs an iterative procedure to establish the block size that was used for writing it. Once the end of a tape is reached, tapeimgr computes SHA512 checksums of all recovered files, and these are subsequently written to a .json file (alongside some basic descriptive and event metadata). A detailed extraction log with the full output of dd is also written for each tape.
 Tapeimgr interface
Post-processing
Since tapeimgr is format-agnostic, it’s up to the user to figure out how to further process the recovered files. Identifying the file format is the first step, and this can be done using the usual suspects such as Unix file(1), Siegfied (both accessible through right-click context menus in BitCurator). Once the format is known, format-specific tools (e.g. tar) can be used to extract the files’ contents.
Recovering the first sample set
After we were confident that our tape processing workflow worked correctly, we used it to process the sample set of DDS and DLT-IV tapes that were lended to us. The majority of the 19 DDS tapes in the sample set could be read without problems. Only 3 tapes resulted in any issues. Two tapes could not be read at all; both of them turned out to be DDS-3 tapes, which are not supported by the DDS-2 tape drive we used. A DDS-3 or DDS-4 drive should be able to read these tapes. For one other tape the extraction resulted in a 10-kB file with only null bytes, which most likely means the tape is faulty. Of the 14 DLT-IV tapes, 7 could be read without problems. For the remaining 7, the reading procedure only resulted in a zero-length file. Interestingly, a common characteristic of all “failed” tapes is that they were written at 40.0 GB capacity, whereas the other tapes were written at 35.0 GB capacity. This is odd, as our DLT-IV drive does support 40.0 GB capacity tapes (which was confirmed by writing some data to a blank test tape at 40.0 GB capacity, which could subsequently be read without problems). This needs some further investigation.
Next steps
The next step (which we haven’t started yet) is to extract the contents of the recovered files. A cursory look suggests that most recovered files in our sample set use the Unix dump format, which can be opened and extracted relatively easily. There are also some tar archives, which are even easier to extract. Once that is done, the real job of reconstructing the web sites that they contain can start, but that will be a different story altogether.
Workflow descriptions and other resources
- The workflow descriptions for DDS-1 and DLT-IV tapes are available on Github. They also include a detailed description of all hardware components we used, including links to original documentation (if available).
- The tapeimgr software is available here.
- Finally, we’re maintaining a categorised Digital forensics and web archaeology resources list, which contains links to many additional tape-related resources.
Acknowledgements
Thanks are due to Peter Boel and René van Egdom for their help digging out the tape drives and other obscure hardware peripherals, and Willem Jan Faber for various helpful hardware-related suggestions.
-
- Also see this useful diagram that shows different PCI card types.↩
- Importantly, for the testing phase we only used some unimportant tapes that we still happened to have lying around. This was done to minimise any chance of accidental damage to the tapes that were lended to us (we did not know in advance whether the tape drives were still working correctly!).↩

